
If you are looking to list a property on Amapha or manage property inquiries professionally, the first step is creating your account correctly.
While the registration process on Amapha is simple, many users experience delays or confusion because they skip important steps or provide incomplete information. This guide is designed to walk you through the entire process clearly and practically — from signing up to completing your profile and preparing to create your first listing.
Whether you are a property agent, agency, property owner, developer, or buyer, this step-by-step guide will help you register successfully without errors.
Take your time, follow each step carefully, and you will be fully set up in just a few minutes.
Before You Start: What You Need
Before kickstarting the registration, make sure you have the following ready:
Active Email Address
You must use a working email address. Amapha normally sends important notifications, updates, and account-related messages to this email.
Active Phone Number
Your phone number is important for communication and verification. Always provide a reachable number.
Strong Password
Choose a secure password that includes a mix of letters, numbers, and symbols. This protects your account from unauthorized access.
Correct Personal or Business Details
Ensure your name, username, and business information are accurate. Incorrect details can cause delays later.
Stable Internet Connection
A poor connection can interrupt the registration process or prevent the form from submitting properly.
Preparing these in advance will make the registration process smooth and stress-free.
How to Register on Amapha
Follow the steps below carefully to create your account successfully.
Step 1: Visit the Amapha Website
Open your browser and go to the official Amapha website.
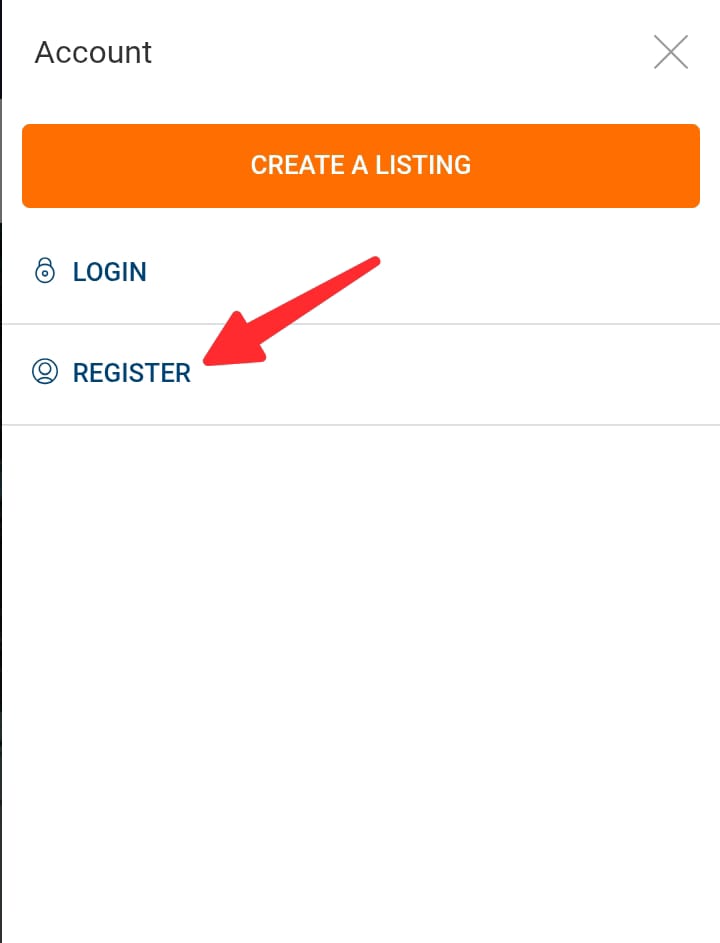
Step 2: Click the Profile Icon and Navigate to “Register”
At the top right side of the website, you will see a profile icon.

- Click on the profile icon.
- A form will pop up showing two options:
- Login
- Register
- Click on “Register” to begin creating your account.
Step 3: Fill in Your Registration Details
After clicking “Register,” the registration form will appear.
You will be required to provide the following information:
- First Name
- Last Name
- Username
- Email Address
- Phone Number
- Password
- Account Type (Agent, Agency, Buyer, etc.)
Take your time and fill in each field correctly, and then click the “Register” button.
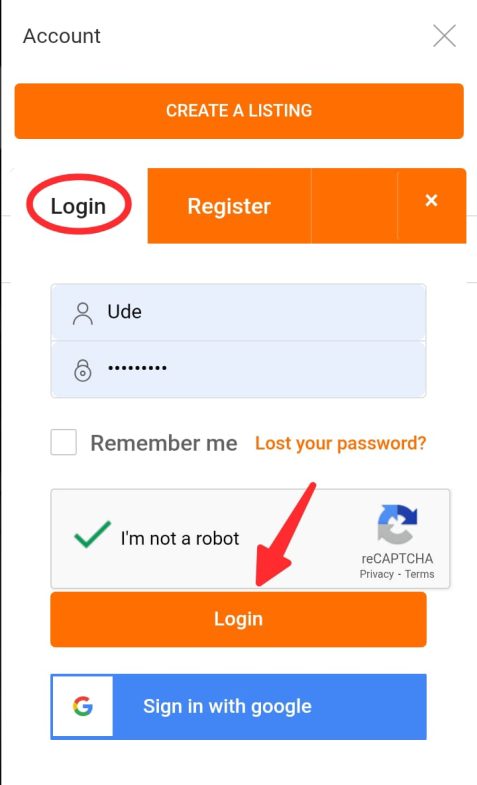
Step 4: Login to Your Dashboard
After successfully submitting your registration form, your account will be created.
Log in by entering your:
- Email address or Username
- Password
Then click Login. You will automatically be redirected to your dashboard after a successful login.
Step 5: Complete Your Profile (Very Important)
Before you even think of creating a listing, make sure you complete your profile properly.
This step is extremely important.
Many users sign up and immediately proceed to create a listing without adding their personal or business details. This is one of the most common reasons listings face delays or rejection.
In today’s Nigerian property market, trust is everything.
Buyers do not just review the property — they review the person or agency behind it. An incomplete or anonymous profile immediately raises red flags and reduces the likelihood of serious inquiries.
How to Complete Your Profile
Now that you have logged in, click the dashboard menu icon located at the top left side, scroll down, and click on “My Profile” to visit your profile page. You can also click here to go to your profile page, but note that you must log in for this to work.
Kindly ensure you complete your profile by filling in the following details:
- A clear profile picture or company logo
- Your full name or registered business name
- Username
- Your public display name
- Your title or position
- A valid and reachable phone number
- Email address
- WhatsApp number
- Valid address
- Service area
- Specialties
- A short professional bio about you or your agency
- Your language
Optional but Recommended:
- Verified social media handles
- Business website
- Office address (if applicable)
These details help buyers verify your authenticity and increase their willingness to contact you.
A complete profile builds trust and improves your overall success on the platform.
Step 6: Create a Listing
Once your profile is fully completed, you can now proceed to create a listing.
From your dashboard, click the menu icon at the top left corner and click on “Create a Listing.”
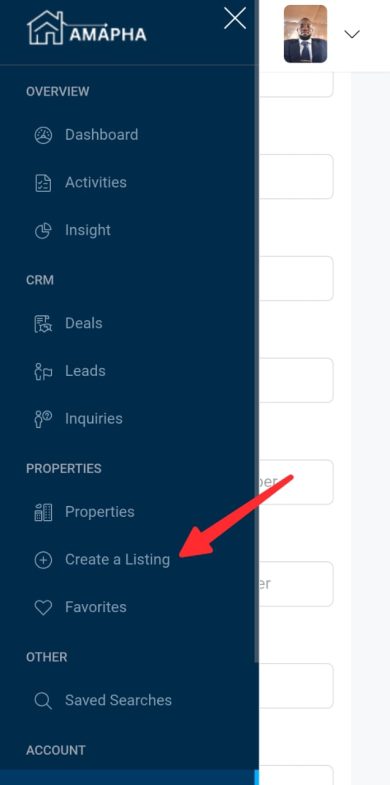
Follow the steps and fill in the property details carefully, and submit your listing for review.
Make sure all information you provide is accurate and complete to avoid delays.
Please check our helpful guide on how to create high-quality property listings that get approved.
Common Registration Problems & How to Fix Them
Even though the registration process on Amapha is simple, some users may encounter small issues. Below are the most common problems and what you should do.
1. Email Already Exists
If you see a message saying “Email already exists,” it means that email address has already been used to create an account on Amapha.
What You Should Do:
- Try logging in instead of registering again.
- If you cannot remember your password, click “Forgot Password.”
- Follow the password reset instructions sent to your email.
Do not attempt to create multiple accounts with the same email address.
2. Username Already Exists
If you receive a message saying “Username already exists,” it means another user has already chosen that username.
What You Should Do:
- Try a different variation of the username.
- You can add numbers (for example: JohnHomes01).
- You can include part of your business name.
- Keep it professional and easy to remember.
Usernames must be unique on the platform.
3. Users Who Sign In With Google
Some users prefer to use the “Sign in with Google” option instead of registering manually.
When you sign in with Google:
- The system automatically creates your account.
- You will automatically be redirected to your profile page to complete your profile details.
This is normal. Make sure to complete all the necessary information. Do not forget to choose your account role (Very important).
Also, some users may not know their password because they signed up using Google and did not create the password manually. This can sometimes cause confusion when trying to log in directly.
The good news is that you can also create a new password. In your profile page, scroll to the button, and you will see the change password option.
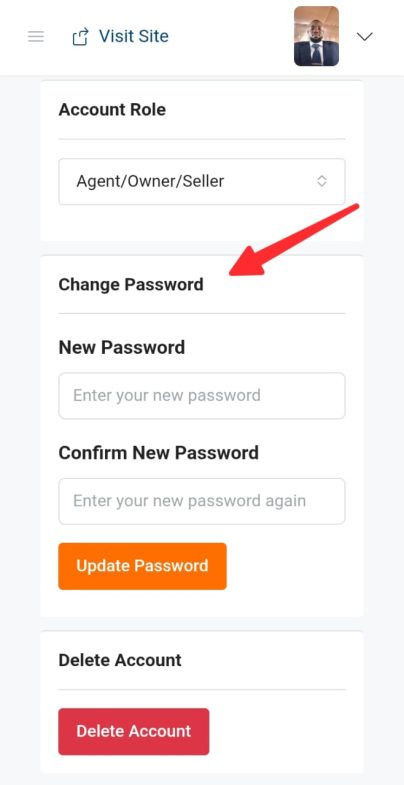
Simply enter your new password, confirm it, and click “Update password,” and you are done.
If you encounter any challenges while registering on the platform, don’t hesitate to contact us.


Join The Discussion